Implementing a UI-Widget
1. Step-by-step guide
This chapter explains the steps required to implement a UI Widget for OpenEMS UI. There are many examples of how ui widgets are created and used in LiveComponent and HistoryComponent.
UI-Modules mainly consist of these components:
- Module
-
Modules should always be used to import and export all of the components, relevant to this Widget. The following components could be part of it:
- FlatWidget
-
directly visible in Live-View.
- ModalComponent
-
Popover, that can be opened when clicking on a
FlatWidget, used in Live-View. - Chart
-
Chart that is shown instead of a modal, used in History-View
2. Create a new module [Live-View]
-
Copy an existing Module e.g. FixActivePower and paste it inside the Live-View.
-
Change the
@Componentselector and use it inside LiveComponent. -
Rename the Module and import it in LiveModule under imports. To be able to see the module in action, you need to create a new switchCase Statement with your controllers factoryId.
    <ion-col size="12" *ngSwitchCase="'Controller.Ess.FixActivePower'"
    size-lg="6" class="ion-no-padding">
        <Controller_Ess_FixActivePower [componentId]="widget.componentId">
        </Controller_Ess_FixActivePower>
    </ion-col>
The Live and History View are designed to show UI-Widgets dependent on the EdgeConfig, except of widgets listed in Common.
If you implemented a controller or component, that is part of an EdgeConfig, you have to use the factoryId as a switchCase statement.
If thats not the case, go into widget.ts and add a identifier to the classes array inside parseWidgets().
|
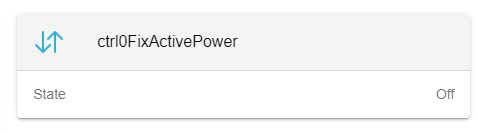
The FlatWidget should now be visible in the Live-View and could be looking like this.